.svg)
What is Notion?
One way or another everyone discovers Notion. Whether it will be for its minimalistic interface, block building nature, or live page publishing. For me it was the doodle-like aesthetics and customization of workspaces I created over the years. All of these nuances make Notion what it is today, a powerhouse of all project management, task tracking, and simple note-taking.
You can create pages, task lists, calendars, and databases to manage any kind of project. Then, organize the information, collaborate with others, and build powerful systems tailored to your workflow.
At its core, Notion is built around a simple but powerful concept: everything is a "block". Whether it's text, an image, a checklist, a table, or even an embedded file. You can create pages to store these blocks, and then nest pages within pages to build a highly organized system.
Notion offers a variety of templates and building tools, to give beginners an easy start to set up workflows for task management, project tracking, note-taking, or personal journaling. With features like drag-and-drop editing and customizable databases, Notion gives you full control over how you capture and organize your work and ideas.
But first you learn the notes, then you play the music. In this guide we’ll go through all the basics you need to know, so by the end you will be comfortable with creating and organizing your projects and docs in Notion without templates as an intermediate user.
Why Use Notion for Task Management?
Notion allows you to fully customize your task lists, add deadlines, assign priorities, and link tasks to larger projects or resources. You can choose different views, such as kanban boards, calendars, or simple lists, depending on how you like to visualize your work.
Task management in Notion is especially powerful because you can integrate notes, documents, and workflows alongside your to-dos.
There’s a big number of tools that integrate Notion to increase the productivity of your projects. When researching, I always end up with a massive list of to-do’s, so tools like Morgen help me visualize and prioritize which task to tackle, so I can hit where it matters without spending hours on planning and actually do the work.

Quick Start With Notion
First, create a free Notion account online or through the mobile app. Once inside, you'll be introduced to a clean workspace where you can begin creating pages. A page in Notion can be anything, a task list, a journal, a meeting agenda, or even a full project database.
An easy way to start is by using Notion’s built-in templates, which offer ready-made layouts for task management, personal goals, project tracking, and more. You can customize the templates by adding text, headings, checklists, images, and other "blocks."
Group related pages and use features like linked databases, tags, and filters for an integrated and organized setup. As you become more comfortable, you can customize your setup with advanced options like formulas, relations between databases, and automations. The key to success with Notion is to start simple, build gradually, and adjust your workspace as your needs evolve.
Prerequisites
1. A free Notion account.
2. Web app or downloaded Notion app.
3. Internet (offline access is limited and internet is required for syncing).
Workspace & Sidebar
Your Notion app is divided into two main areas: the sidebar and the editor. We’ll go through both along with tips to get started.
Sidebar Overview
The sidebar is your command center for accessing pages, databases, teamspaces, settings, and more. Everything you create, pages, tasks, or databases, will appear here. The sidebar is fully expandable, collapsible, and customizable, allowing you to nest pages infinitely to create a structure that matches your personal or team organization.
The sidebar is divided into several sections:
- Teamspaces (on paid plans): Organize work by team or department.
- Shared: Pages shared with specific members.
- Private: Pages only you can see.
- Favorites: Pages you’ve starred for quick access. By clicking ⭐ at the top of it, the page appears under Favorites to keep key project pages close at hand.

Next to the Create new page, you can click close sidebar, or cmd + \ to collapse sections and keep things tidy. Drag-and-drop properties to rearrange your sidebar exactly how you like.
The top of the sidebar includes powerful tools:
- Workspace Switcher: Switch between different workspaces or create a new one.
- Search: Quickly find any page, database, or recent activity.
- Home: View your most important pages and action items.
- Inbox: See all notifications, mentions, and work assignments in one place.
- Settings: Adjust everything from appearance to notifications.
- Templates: Quickly start new projects with pre-built templates.
- Trash: Deleted pages live here temporarily and can be restored if needed.
- 📝 Create a New Page: At the top of the sidebar, use the shortcut
cmd/ctrl + N, or tap 📝 at the bottom of your mobile app.
You’ll also find quick links to Settings, Templates, and Trash at the bottom of the sidebar.
Editor Overview
The editor is the workspace where you create and manage content. Think of it as a blank canvas for writing, planning, brainstorming, or building full systems.

Key features of the editor include:
- Minimal distractions: Once you start typing, control menus fade into the background, helping you focus deeply.
- Collaborator presence: See live profile pictures of teammates viewing or editing the same page.
- Share menu: Easily manage permissions, share a page link, or invite collaborators via email.
The editor supports dozens of block types (text, headings, lists, images, tables, databases, embeds, etc.) giving you full flexibility in how you structure content.
Team vs. Personal Workspaces
Personal workspaces

Newly created pages are private by default.
Team workspaces (Plus, Business, or Enterprise Plans)

Sidebar organization under Teamspaces is shared among members. Everyone sees the same structure, but can individually collapse or expand page trees without affecting others.
Admins in team plans can manage member permissions and control page visibility more granularly.
Pages & Blocks
Notion is built around the concept of pages and blocks, giving you impeccable flexibility in writing, planning, organizing, and connecting information. Whether you're building a knowledge base, writing a blog post, or designing a dashboard, understanding how to use blocks, pages, links, and synced content gives you full control over your workspace.
Notion Pages
Pages are where all your content lives. They can be standalone documents, nested inside other pages, or linked throughout your workspace. You can create a new page from the sidebar, the /page command, or with keyboard shortcuts. Pages can contain anything from text, images, databases, embedded files, to additional pages.

Notion Blocks
Inside pages, all content is made up of blocks. All paragraphs, lists, headings, media, tables, databases, and more.
These blocks can be:

- Dragged and dropped
- Edited inline
- Converted to other types
- Nested inside toggles, synced blocks, or columns
Linking Content in Notion
Notion makes it easy to create a connected workspace by linking pages and blocks together. Connected workspace are all your tools, information, and people in one place, with the goal of reducing context switching, and enhancing team collaboration.
- @-mention,
[[, or+followed by a page name links to another Notion page inline. - Use
/link to pageto create a visual block that links to another page (it will also appear in your sidebar as a subpage). - Every block has a unique link, click the ⋮⋮ handle → Copy link to share it.
- Paste URLs from external sites to create web bookmarks with previews.
Synced Content
Synced blocks let you mirror content across multiple pages or within the same page, so updates in one place appear everywhere else.
How to Sync Content Across Pages
1. Select one or more blocks.
2. Copy with cmd/ctrl + C.
3. Paste in another page.
4. Choose Paste and sync, a red outline will appear around synced blocks.

Create New Synced Blocks from Scratch
- Type
/syncedblockor use the + menu - Add or drag content into the synced block
- Use Copy and sync to paste into other locations
Identify & Edit Synced Blocks
- Synced blocks have a red border on hover
- Clicking inside lets you edit the content, which updates all instances
- Use the Editing in ↙ X other pages menu to view all locations
- The original block is labeled ORIGINAL

Unsyncing Content
Synced blocks are perfect for reusable FAQs, process documentation, status updates, or recurring callouts across different pages.
- To unsync a single instance, click ⋮⋮ → Unsync
- To unsync all copies, go to the original block → ⋮⋮ → Unsync all
Wikis
Notion lets you turn any page into a wiki, great for organizing company documentation, team handbooks, or learning hubs.
How to Create a Wiki
1. Open a page → click •• → Turn into wiki

Wikis come with three built-in views:
- Home: Custom landing page
- All pages: A database of every wiki page
- Pages I own: View only pages assigned to you
You can add more views like timelines, calendars, or kanban boards.
Verified Pages & Owners
Pages can be verified to confirm accuracy and ownership. Verified pages show a ✅ badge and can expire on a set schedule, notifying the page owner when it’s time to review or update.
Undo a Wiki
Click ••• → Undo wiki to convert it back into a normal page.
Organize & Format Your Content
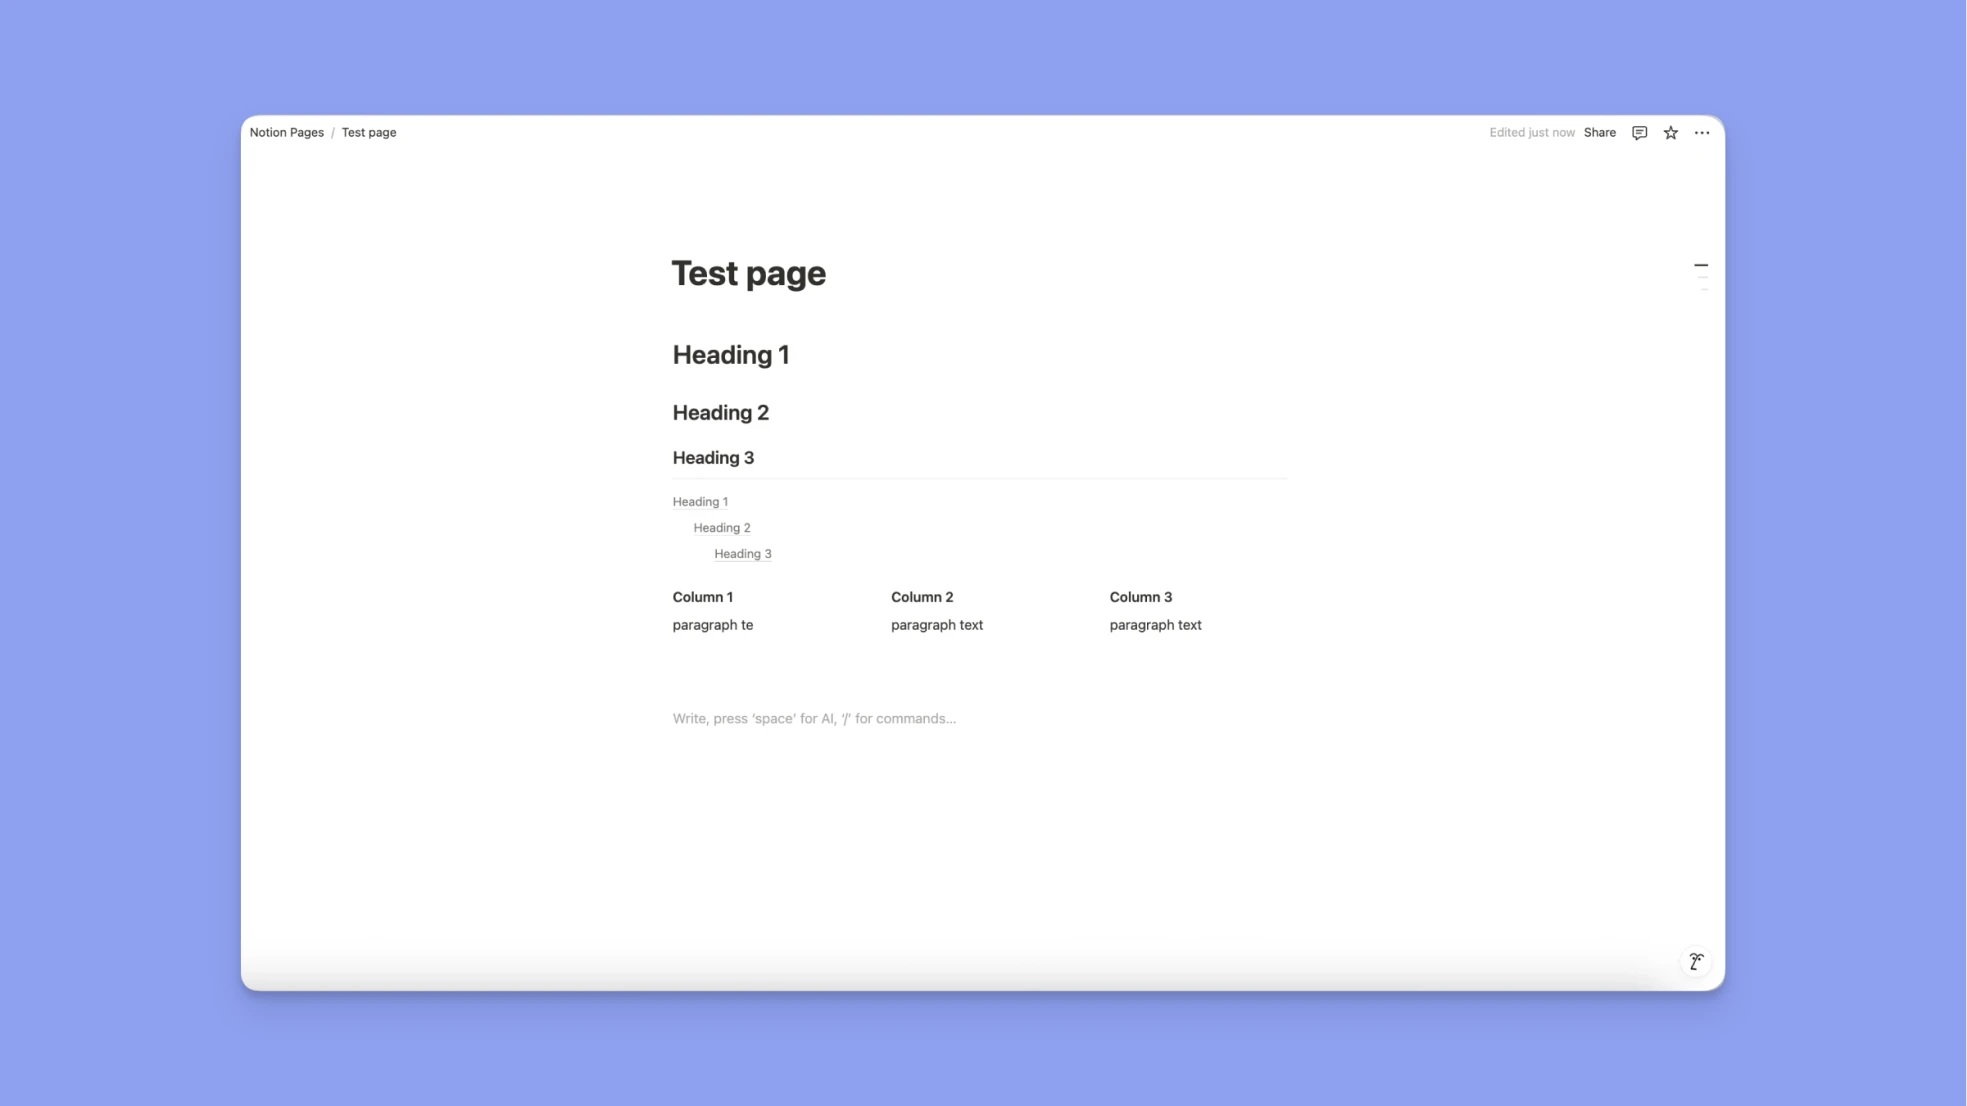
Headings
Add hierarchy and readability with /h1, /h2, and /h3. You can also turn headings into toggles to collapse content.
Columns
Drag any block beside another to create columns. You can create multi-column layouts and even place media blocks side by side.
Dividers
Insert dividers with /divider or by typing --- to visually break up content.
Table of Contents
Use /table of contents to auto-generate a clickable list of headings in your page — ideal for long documents or wikis.
Media & File Embeds
Notion supports a wide range of file formats:
- Images: JPG, PNG, GIF, WEBP, SVG, HEIC, etc.
- Videos: MP4, YouTube, Vimeo
- Audio: MP3, WAV, OGG
- Docs: PDF
You can:
- Drag and drop media
- Use
/image,/video,/audio,/file, or/embed - Resize, crop, align, mask, or add captions
- View full screen, download, or replace files
Tables: Simple vs. Database
Need a quick matrix? Use a simple table:
- Insert with
/table - Add/remove rows and columns with the + button
- Use options for headers and column width
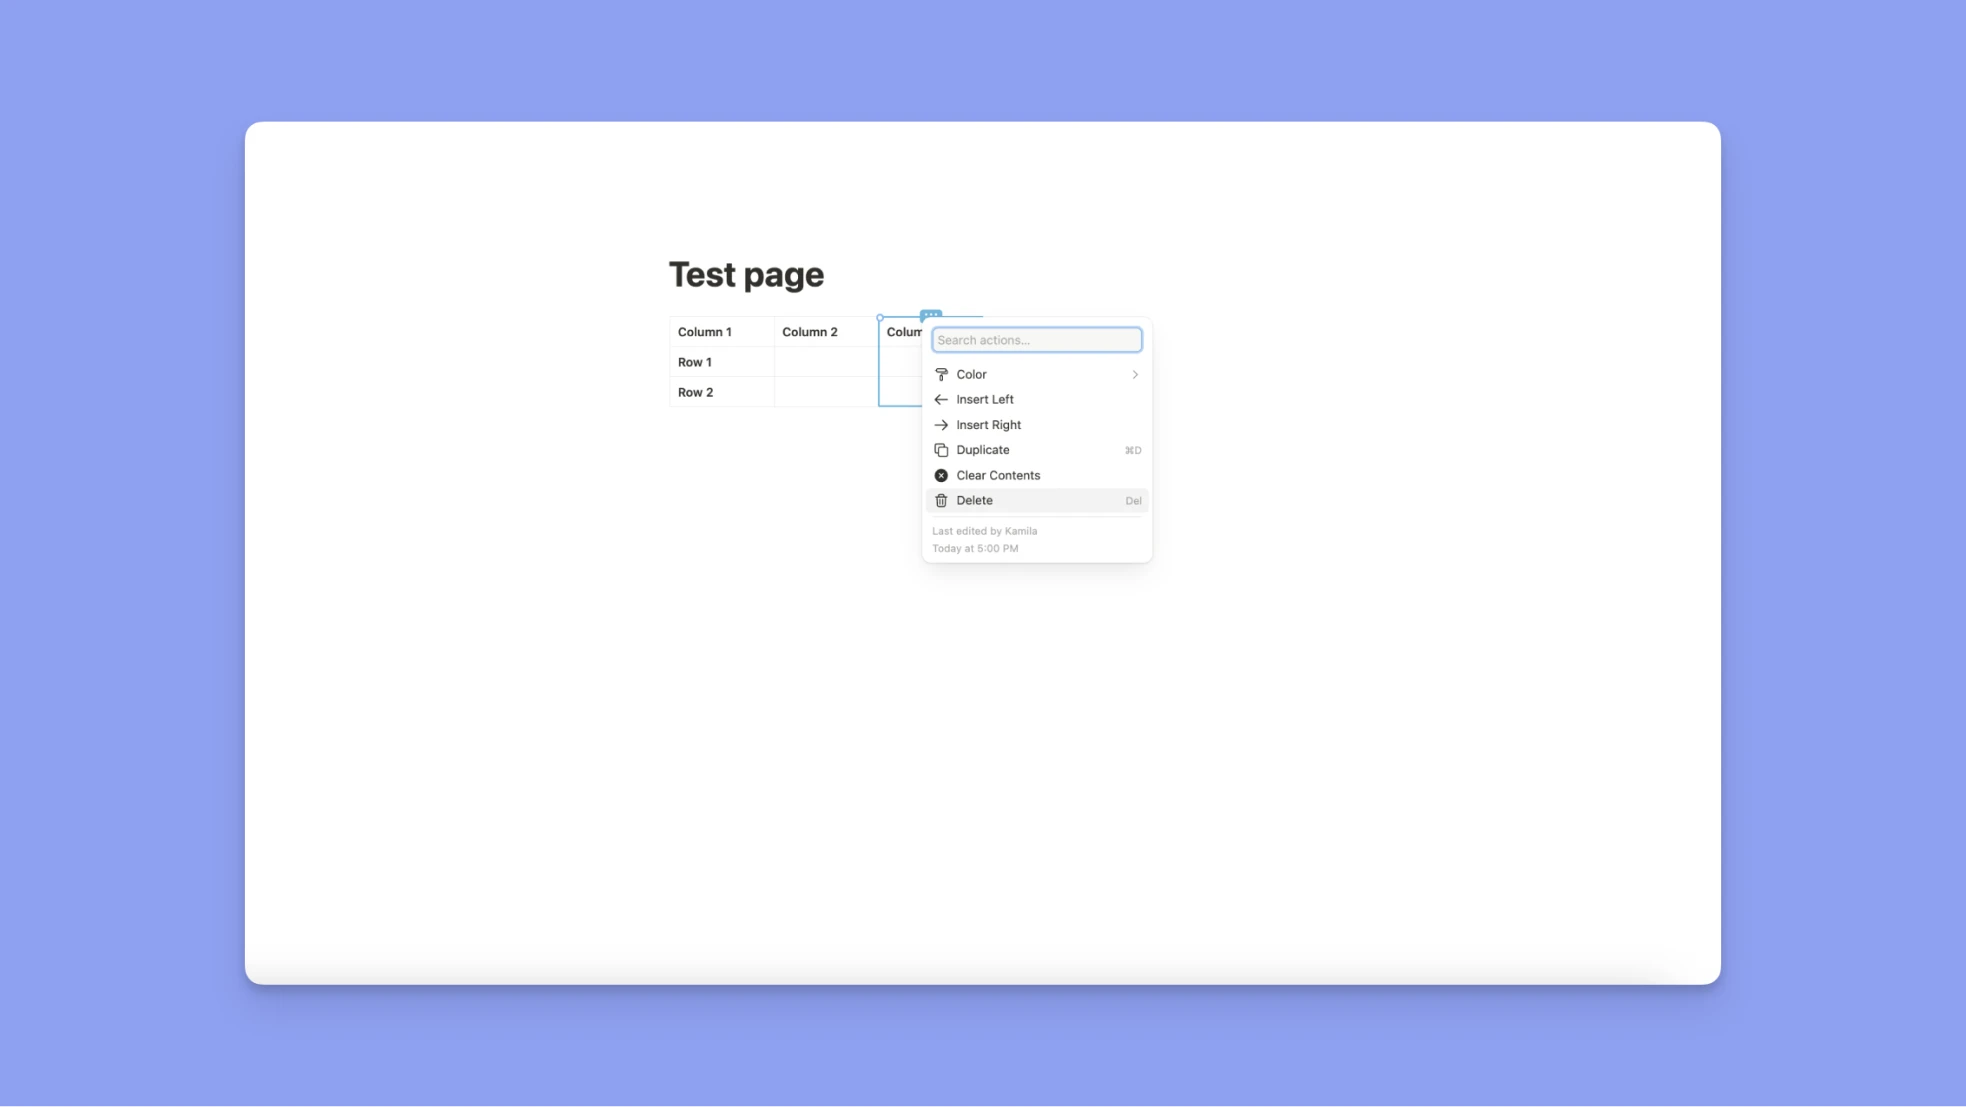
Database include advanced features like filters, sorting, or relations. By clicking ••• → you will turn a table into a database. See Database chapter for more info.
Code Blocks
Code blocks in Notion are perfect for developers, technical writers, or anyone maintaining a personal library of scripts and code snippets. They allow you to present code with clean formatting, proper indentation, and syntax highlighting, all while keeping your main content easy to read.
Adding a Code Block
To insert a code block:
- Type
/codeand press Enter - Or, click the + icon in the left margin and select Code
This will create a separate block with a monospaced font where you can type or paste your code.
Syntax Highlighting
Notion supports syntax highlighting for many popular languages, including JavaScript, Python, HTML, CSS, SQL, Bash, and more.
To choose your language:
- Click the language name at the top-left of the code block
- Start typing to search your desired language, then select it
This ensures your code is color-coded and formatted correctly, making it easier to read and understand.
Wrap Code
By default, long lines of code may require horizontal scrolling. To wrap lines within the block:
- Hover over the code block and click the •• menu
- Toggle on Wrap code, this adds line breaks to fit the block’s width
Copy or Caption Code Blocks
When you hover over a code block, you'll see options to:
- Copy: Instantly copy the entire block to your clipboard
- Caption: Add a brief description or label for your code
You can also access these from the ••• menu, where additional options like block alignment and duplication are available.
Advanced features
Next up, we'll dive into databases, collaborations, formulas, APIs, settings, AI, calendar, sites and marketplace.
What is a Notion Database?
Notion databases are one of the most powerful tools in the platform. More than just tables or spreadsheets, every row in a Notion database is a fully editable page, which means you can manage complex workflows, organize content, and track progress.
Databases are great if you're building a content calendar, a project tracker, a CRM, or a company wiki.
What Makes Notion Databases Unique?
- Each item is a page: Every entry is a full-featured Notion page, which can include notes, checklists, media, subpages, or anything else you’d put in a normal Notion page.
- Customizable properties: Add properties like text, dates, tags, people, status fields, numbers, checkboxes, formulas, and relations. These help you structure and label your content for easy sorting and filtering.
- Multiple views: Visualize your data as a table, board (kanban), calendar, gallery, list, timeline, or chart. Switch between views based on what’s most helpful at any given moment.
Creating a Database
Keep in mind:
- A relation connects one database to another (like linking a Task to a Project).
- A rollup reaches through that relation and pulls in specific information, like the deadline of the project, or how many tasks are marked “Done.”
- Relation: Links to the Projects database
- Rollups: Can roll up project deadline or priority from the related Project
To create a new database:
- On a new page, choose “Table” under “Get started with.”
- Use the
/databasecommand to insert a database inline - Choose from Suggested templates, use ChatGPT or Notion’s built-in AI to help generate a database structure with a custom prompt
Example prompt:
“Create a Notion workspace structure with connected databases for [your use case]. It should include the main entities (e.g., projects, tasks, team members), show how they relate to each other, and include example properties, views, and suggested rollups. Make it modular, scalable, and beginner-friendly.”
Main entites to consider for task management:
- User – The person using the system.
- Task – The central item representing work to be done.
- Description - Task details.
- Due date - A date when the task is to be finished.
- Status - Current task state can be to-do, doing, or done (you can further customize this)
- Priority - Task priority in a time period.
- Energy required - How much energy you need to finish this task— high, mid, low.
- Subtasks - Smaller steps within a parent task.
Notion databases types:
- Full-page databases: Appear as their own pages in your sidebar. They can be locked (via
••→ Lock database) to prevent structure edits. - Inline databases: Embedded within another page. Use the expand icon (⤡) to open in full-page mode. Drag into the sidebar to convert it into a full-page database.
Adding & Opening Database Pages
Every database item is a Notion page.
To add an item:
- Click + New at the top of the database or at the bottom of a table/list/board/gallery.
- In calendars, click the + on any date.
To open an item:
- In tables/lists, click the title or OPEN button.
- In boards/galleries/calendars, click anywhere on the card.
- Click ⤡ inside the preview to open it as a full page.
You can add any blocks inside database pages: text, images, subpages, synced blocks, etc.
Customizing Database Pages
At the top of each database page, you’ll see its properties. You can customize what displays and how:
- Click
••→ Customize page - Choose Always show, Hide when empty, or Always hide for each property
- Rearrange property order with the ⋮⋮ drag handle
- Adjust display of backlinks and comments
Backlinks: Expanded, Popover, or Off
Comments: Expanded or Off
This helps keep your pages clean, especially when working with many properties.
Navigating & Viewing Databases
Each database includes powerful tools to manage and analyze your data:
- Views: Create multiple views for different teams or tasks (e.g., “This Week,” “In Progress,” “Completed”)
- Add View: Click the dropdown next to the view name → Add view → Choose layout (table, board, etc.)
- Filters & Sorts: Apply filters to show only what you need; sort by any property
- Search: Instantly find matching database entries
- •• Menu: Change grouping, layout, and property visibility
Item Options
Right-click any database row (or click the ⋮⋮ handle) to:
- Delete or Duplicate an item
- Copy link to share it
- Rename the item without opening it
- Move to another workspace/page
- Edit properties quickly in-line
Collaborating in Databases
Databases are powerful collaboration tools. Notion gives you granular control over who can edit what.
“Can Edit Content” Permission
This permission allows users to:
- Add, edit, and delete pages ****in the database
- Modify property values
But does not allow:
- Changing database structure (properties, views, filters, sorts)
- Locking or unlocking the database
Linked databases respect these permissions but allow users to create custom filtered views elsewhere in the workspace.
Using Linked Databases
You can reference a database in multiple locations using linked databases:
- Use
/linked databaseand select the one you want - Apply different filters, views, and sorts in each location
- Linked databases reflect real-time updates from the source
This makes it easy to present the same dataset differently across teams or documents.
Templates in Databases
Each database can include custom templates:
- Click the dropdown next to + New → + New template
- Add pre-built structure for tasks, meeting notes, bug reports, etc.
- Use Notion AI to help generate template layouts
Templates help standardize your data and reduce repetitive setup.
Locking & Duplicating Databases
- Lock database: Prevent changes to structure (in
••menu) - Duplicate database: Choose to copy the structure only or structure + content
Duplicating is ideal for reusing layouts across teams or projects.
Sharing & Collaboration
Notion is designed for collaboration, whether you're working with teammates in your workspace, clients outside your company, or your followers. With flexible sharing settings, you can control who sees and edits your pages, databases, and teamspaces.
Ways to Share in Notion
You can share Notion pages and databases in a variety of ways:
- With individuals or groups in your workspace
- With guests via email
- With entire teamspaces
- With the public via a shareable link
- As a Notion Site using the Publish feature
Click Share at the top of any page to open the Share menu, where you can:
- Invite people to a page
- Set permission levels
- Copy the page link
- Open the Publish tab to make your page public
You can also access publishing options via the ••• menu → Publish tab.
General Access Levels
Under General Access, you can choose who can access a page and what they can do with it:
- Only people invited – The page is private and visible only to you and invitees.
- Everyone in workspace – All workspace members can find the page via search or with the link. You can optionally Hide in search for unvisited users.
- Anyone with the link – Share with external users. They'll need a Notion account to comment or edit. You can also set a link expiration.
Share with Individuals or Groups
To share with specific people:
1. Click Share at the top of the page.
2. Enter a workspace member's name or email.
3. Choose a permission level from the dropdown.
4. Click Invite.
The page will appear in their Shared sidebar section. You can also share with groups for faster access control.
Sharing Publicly
To share with the wider internet:
- Open the Share menu → Publish tab
- Enable “Publish to web”
- Set general access to “Anyone with the link”
- Manage link expiration or embed as a Notion Site
This is perfect for wikis, public docs, event pages, or portfolios.
Share with a Teamspace
Teamspaces are shared sections for teams inside your workspace. Each has its own members and permission settings.
You can share pages by:
- Dragging a page into a teamspace from the sidebar
- Creating a new page inside a teamspace
Some teamspaces may be default, meaning all members of the workspace are automatically part of them.
To check if a teamspace is default:
- Click
••next to the teamspace → Teamspace settings → Members tab → Look for “Default” under Permissions.
Share with Guests
Guests are people outside your workspace (like contractors or clients). To share:
- Enter their email in the Share menu
- They’ll receive an invite to the page and need a Notion account to access
Stop Sharing or Make a Page Private
To revoke access:
- Drag a page into the Private section of your sidebar (others will lose access)
- Open Share menu → Click the dropdown next to a person or group → Remove
Permission Levels in Notion
Assign precise control to individuals or groups:
See Who Can Access a Page
At the top of a page, you’ll see avatars for people with access:
- Faded avatars = not currently viewing
- Solid avatars = viewing/editing live
Hover to see names, emails, and activity. Clicking an avatar jumps to where they’re editing.
Use the ••• menu → see Last edited by and timestamp at the bottom.
Requesting Access or Permissions
Trying to access a restricted page?
- Click No access to request view or edit access
- This notifies the page owner to approve or deny your request
To request edit access:
- Click Share
- Open your permission dropdown
- Select Request edit access
Enterprise-Grade Controls
Enterprise workspace owners can manage:
- Public sharing policies
- Guest invitation controls
- Allowed email domains
- Default teamspace permissions
Go to Settings → Security to configure these protections and maintain workspace compliance.
Notion API & Custom Integrations
For developers looking to go beyond prebuilt integrations, Notion’s public API opens the door to building fully custom workflows, bots, automations, and internal tools. With internal integrations, webhooks, and granular permissions, you can create connections for managing content, syncing data, or reacting to updates in real-time.

Create an Internal Integration
To create one:
1. Go to Settings → Integrations in your sidebar
(Only Workspace Owners can access this tab.)
2. Click Develop your own integrations
Your browser will open to the My Integrations dashboard
3. → Click + New Integration
4. Fill in:
Name of the integration
1. Optional logo
2. Select the Associated Workspace
3. Once created, go to Settings → Connections, find your integration, and click •• to:
- Retrieve the internal token
- Manage access
- Disconnect or modify the integration
Create a Public Integration
To make your integration available to all Notion users:
1. First, create an internal integration as above.
2. Then follow Notion’s developer documentation to convert it into a public integration, including:
- OAuth flow setup
- Scoping permissions
- Publishing to Notion’s integration gallery (optional)
Granular Permissions for Integrations
When setting up an integration, you choose what the integration can do and see. Permissions are broken into:
Content Capabilities:
- Read content only
- Write content only
- Insert content (append-only)
User Capabilities:
- No user info
- Read user info (with or without email)
These permissions are visible to users during setup and shown in the Share menu of any page the integration accesses.
Integration Webhooks
Notion supports real-time webhooks that notify your integration of content changes.
Use integration webhooks to:
- Detect updates in connected pages or databases
- Sync changes to other apps instantly
- Trigger automations based on Notion activity
Webhook Actions vs. Integration Webhooks
While both can send events to third-party services, they serve different purposes:
Recommended Notion Integrations
Automations in Notion
Notion automations help you eliminate repetitive tasks, streamline workflows, and get more done with fewer clicks. With buttons, you can automate everything from sending notifications to editing database entries, all without writing a single line of code.
Notion supports two types of buttons:
- Page buttons: Add interactive buttons to any Notion page
- Database buttons: Automate actions on specific database items
Page Buttons: Automate with a Click
With template buttons on pages, you can:
- Trigger actions like creating pages, editing data, or notifying users
- Stack multiple actions into one click
- Dynamically customize with variables, mentions, and formulas
Create a Page Button
- Type
/buttonon a page - Name the button and pick an emoji
- Add one or more actions using the + New action option
- Click Done to save
Available Actions for Page Buttons
Mentions & Formulas
Use @ to reference users, pages, or dates. Use ∑ for formulas like:
[Page title] - Updated on [Today’s date]Hi @Person, your task is due on ∑[Due Date]
Database Buttons
Database buttons are a game changer for structured, repeatable tasks, like approvals, follow-ups, status updates, or habit tracking.
Each button is a database property and lives in a row, executing actions on that specific item.
Who Can Use Database Buttons?
- Create/edit: Anyone with Full access or Can edit
- Click buttons: Also allowed for users with Can edit content
Create a Database Button
1. Open your database → Click •• → Properties → New property → Button
2. Name your button (e.g., "Approve", "Done", "Send reminder")
3. Click Edit automation to add actions
4. Use @ or ∑ in fields to pull from the current row's properties
Available Actions for Database Buttons
Send Mail to from a Database Button
1. Add a Button property → Edit automation → Send mail to
2. Customize the To, Subject, Message, and more
3. Use row-specific data like:
- Page creator
- Due date
- Status
- Custom formulas or mentions
You can CC, BCC, and set reply-to addresses, even define display names with dynamic content.
Define Variables in Database Buttons
Set up named variables using:
@(mentions like people or properties)∑(formulas like today’s date, or concatenated strings)
Use them in:
- Email subjects
- Property updates
- Notifications and Slack messages
Formulas in Notion
Notion formulas empower you to calculate, manipulate, and automate data in your databases. Whether you’re tracking task progress, scoring ideas, or creating conditional logic for automations, formulas help you transform static data into dynamic outputs.
Where Can You Use Formulas in Notion?
You can use formulas in several places across Notion:
- As a database property (most common use)
- Inside page buttons and database buttons
- Within database automations to define variables or logic
Each formula evaluates and returns a dynamic result, text, number, Boolean (true/false), or date, based on your other properties or functions.
How to Create and Edit a Formula
Create a Formula Property
1. Open your database → click •• → Properties
2. Click New property → Formula
3. Name your formula (e.g., “Priority Score” or “Overdue?”)
4. Click Edit formula to open the Formula Editor
Use the Formula Editor
The formula editor includes:
- A text field to enter your formula
- A left-hand panel listing available database properties and built-in functions
- A right-hand panel showing syntax explanations and real-time tips
- A live preview of the result when editing from a database row
Formula Components
Formulas are built using:
- Properties: Data in your current database (e.g., Status, Due Date, Priority)
- Built-ins: Operators and logical values like
+, ,or,false,!= - Functions: Actions like
replace(),sum(),length(),now(), ordateAdd()
Notion also supports style formatting inside formulas, and logical operators like if(), and(), or(), and the ternary operator X ? Y : Z.
Formula Examples
Project management example
Functions used: dateAdd(), if(), and(), now(), style(), map(), length()
Project brainstorming with RICE Example
Use this to prioritize projects based on quantitative impact, and track interest through upvote metrics.
Task Management Automation
Trigger an automation when all subtasks are marked as "Done" and update the parent task accordingly:
1. Trigger condition: When Status = Done
2. Define parent task:
3.Trigger page.Parent item.first()
4. Check all subtasks done:
5.Parent Task.Sub-item ? Parent Task.Sub-item.every(current.Status == "Done") : false
6. Update parent task status:
7.All subtasks done? ? "Done" : Parent Task.Status
Functions used: first(), every(), ternary operator X ? Y : Z
This setup is ideal for project hierarchies where sub-tasks drive the completion status of parent tasks.
Using Formulas in Automations & Buttons
You can embed formulas directly into:
- Page buttons
- Database buttons
- Database automations
Use formulas to dynamically:
- Insert people’s names, page titles, or dates
- Create calculated subject lines or messages for emails
- Style or conditionally format content
- Control branching logic with Boolean evaluations
Notion Pricing Guide
Notion offers flexible pricing plans for individuals, teams, and enterprises, with core features included in every tier and powerful upgrades available as you scale.
Choose to pay monthly or annually. All prices below are in EUR.
Free – €0
Best for personal projects, study plans, or side gigs.
Includes:
- Collaborative workspace
- Integration with Slack, GitHub & more
- Basic page analytics
- 7-day page history
- Invite up to 10 guests
- Notion Mail (Gmail sync)
- Notion Calendar
Plus – €9.50 per seat/month
Added more collaboration power.
Everything in Free, plus:
- Unlimited blocks for teams
- Unlimited file uploads
- 30-day page history
- Invite up to 100 guests
- Synced databases with third-party apps
- Custom websites
- Custom automations
- Charts & dashboards
Business – €14 per seat/month
Added more control and analytics.
Everything in Plus, plus:
- SAML SSO (Single Sign-On)
- Page verification
- Bulk PDF export
- Advanced page analytics
- 90-day page history
- Invite up to 250 guests
Enterprise – Custom pricing
Added advanced security, scale, and dedicated support.
Everything in Business, plus:
- User provisioning (SCIM)
- Advanced security & admin controls
- Audit log
- Workspace analytics
- Unlimited page history
- Dedicated Customer Success Manager
- Security & Compliance integrations
- Invite up to 250 guests
Notion AI (Add-on)
Notion AI is available as a paid upgrade on all plans. Helps with:
- Writing & editing
- Summarizing & translating
- Autofilling data
- Asking contextual questions inside docs
Notion Pricing Overview
Workspace Administration
Admins can manage workspace settings, invite and remove members, assign roles, and control access. Enterprise workspaces offer deeper controls like SAML SSO, audit logs, and granular permissions.
Workspace Administration Roles in Notion
Settings in Notion
Notion's settings give you control over your personal account, workspace preferences, appearance, language, privacy, and device behavior, including desktop, web, or mobile.
Account Settings
Change Your Profile Photo
Available on desktop and web:
1. Go to Settings → [Your Name]
2. Click your current photo (or initial) above "Add photo"
3. Choose an image file and click Open
Change Your Name
1. Go to Settings → [Your Name]
2. Edit the field under Preferred name
Change Your Email Address
1. Go to Settings → [Your Name] → Account security → Change email
2. Follow the verification flow:
- With a password: enter it
- Without a password: verify via old email
3. Enter your new email → Get verification code
4. Paste code → Click Change email
Set, Change, or Remove Your Password
1. Go to Settings → [Your Name]
2. Select Set a password or Change password
3. Enter your password following the requirements (min. 8 characters, 3 special characters, 1 letter, 1 number)
Appearance & Accessibility
Customize Appearance on Desktop
1. Go to Settings → Preferences → Appearance
2. Choose:
- Use system setting
- Light mode
- Dark mode
Customize Appearance on Mobile
1. Tap •• in the sidebar → Settings → Appearance
2. Choose System setting, Light, or Dark
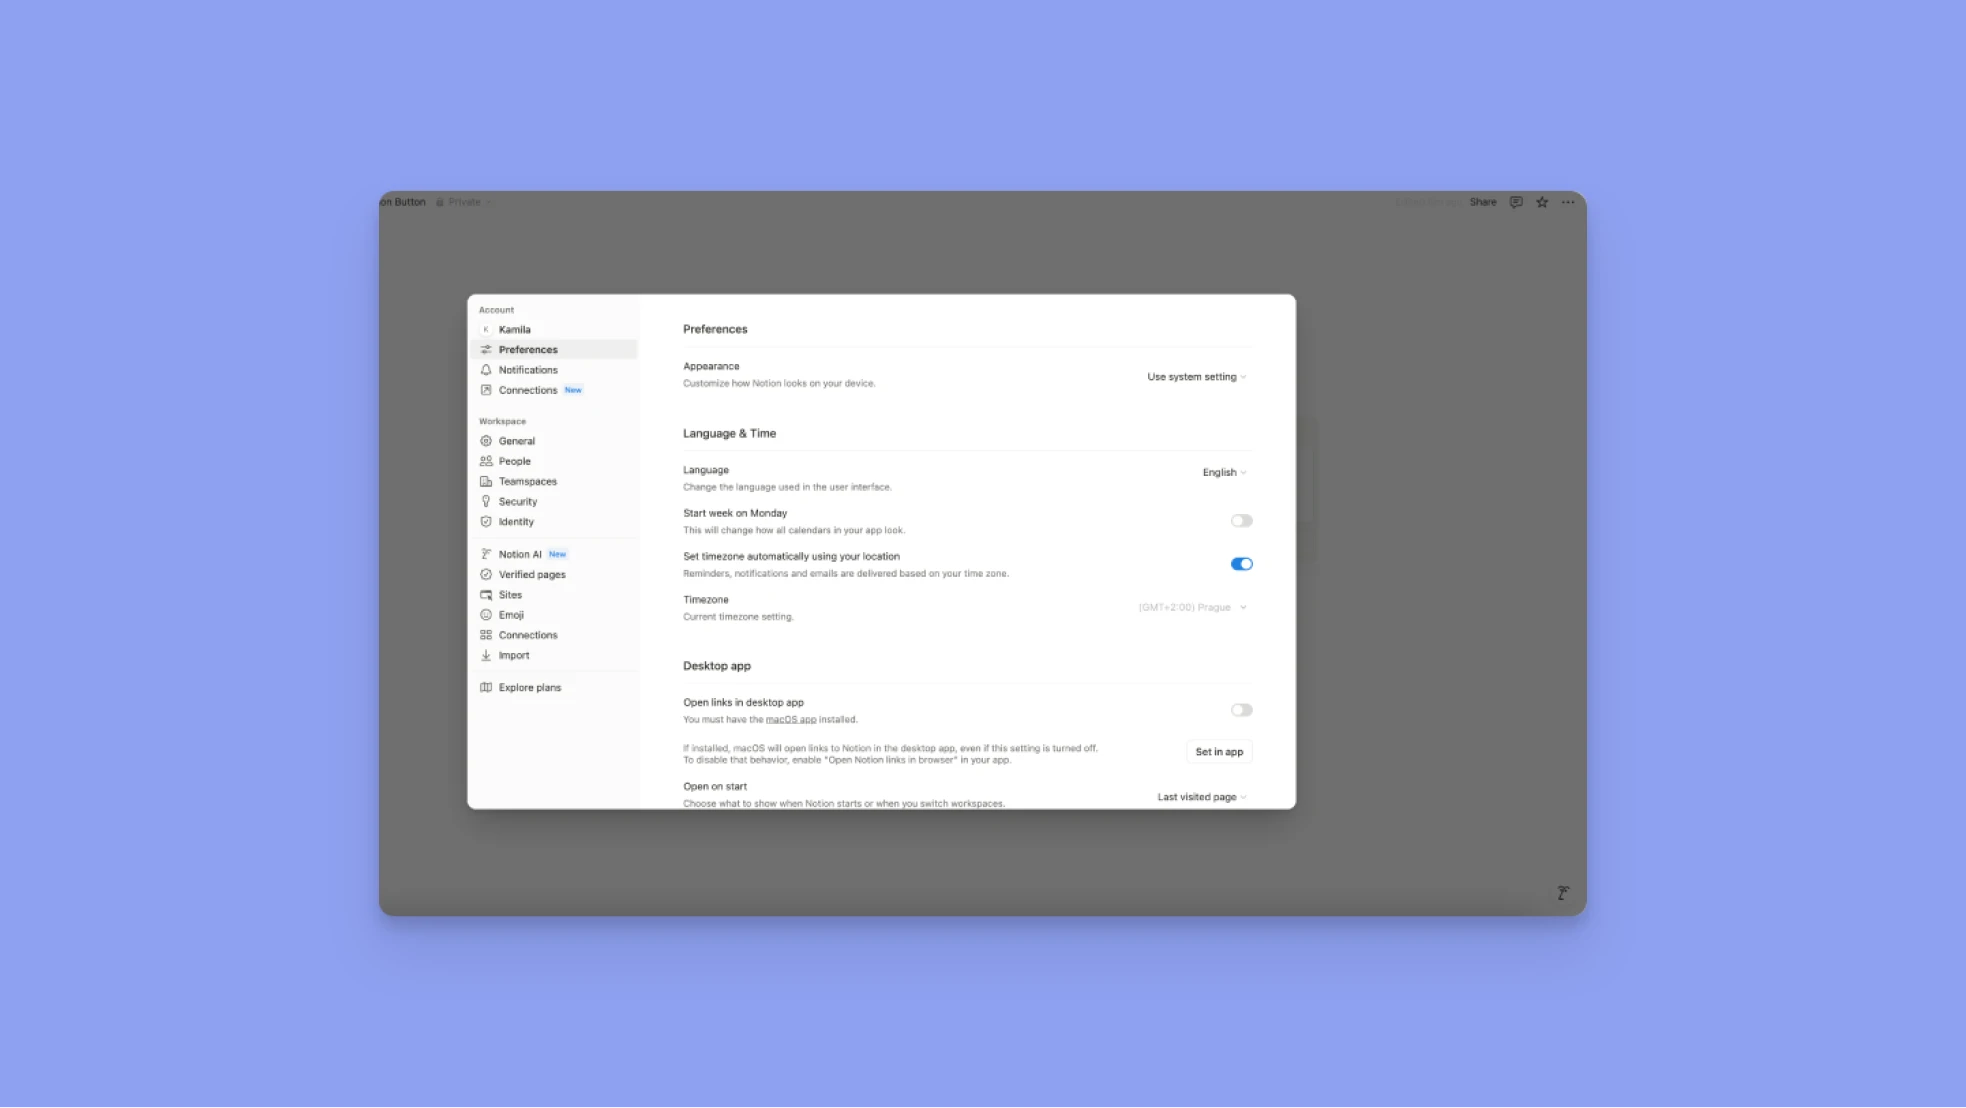
Language, Region & Display
Change Your Display Language
1. Go to Settings → Preferences → Language & Time → Language
2. Choose from:
- English, Korean, Japanese, French, German, Spanish (Spain & LATAM), Portuguese (Brazil), Simplified/Traditional Chinese, Dutch, Norwegian, Swedish, Danish (Beta), Finnish
Start Your Calendar Week on Monday
1. Go to Settings → Preferences → Language & Time
2. Toggle Start week on Monday
Change Your Time Zone
1. Go to Settings → Preferences → Language & Time
2. Manually set or enable Auto update time zone
Desktop App Preferences
On Startup
Set what appears when the app opens:
- Continue where you left off
- Default page
Command Search & Menu Bar
Enable Command Search to launch Notion from anywhere:
- Show in Menu Bar
- Customize keyboard shortcuts
New Tab Behavior
- Toggle Open Search when creating new tab
- Choose whether to show default page instead
Notion Link Behavior
- Toggle Open Notion links in browser
- Or allow web links to redirect to the desktop app
Open Links in Desktop App
Want Notion links from your browser to open in the app?
1. Go to Settings → Preferences
2. Toggle Open links in desktop app
3. In your desktop app, make sure Open links in browser is turned off
If it's not working:
- Open the link in browser → Click
••→ Open in Mac app
Privacy & Analytics
View History
To opt out of analytics:
1. Go to Settings → Preferences → Privacy
2. Under Show my view history, select Don't record
Profile Discoverability
Control if others can find your profile using your email:
1. Go to Settings → Preferences → Privacy
2. Toggle Profile discoverability on/off
Delete Your Notion Account
If you no longer wish to use Notion, you can permanently delete your account, but make sure you understand the consequences first.
What Happens When You Delete Your Account
Deleting your Notion account is permanent and affects all associated content and workspaces.
Here’s what happens:
- All private workspaces where you're the only member will be permanently deleted
- Shared workspaces where you're the only admin will also be deleted for everyone
- Deleted workspaces are inaccessible to all members, not just you
- You'll be removed from any shared workspaces you were a part of
- You’ll lose access to all your pages, even personal and private ones
- A warning message will show which workspaces will be affected before you confirm
How to Delete Your Account
1. Go to Settings → [Your Name]
2. Scroll down and click Delete my account
3. A pop-up will display affected workspaces
4. To confirm, enter your account email
5. Click Permanently delete account and {#} workspaces
Notion AI
Notion AI is integrated into your workspace, helping you search, write, summarize, brainstorm, translate, and take action, all without switching apps.
It’s useful for managing projects, reviewing docs, or exploring ideas, as it works alongside your notes, databases, and collaborators to speed up your work.
Where to Find Notion AI
You can access Notion AI from multiple points across your workspace:
- The Notion AI icon in the bottom corner of any page
- The Notion AI chat from your sidebar
Inline, by:
- Hitting space in a new block
- Clicking
⋮⋮on any block → Ask AI - Highlighting text and selecting Ask AI
Notion AI Shortcuts
Desktop shortcut: Shift + Cmd/Ctrl + J (customizable via Settings → Preferences)
iOS access:
- Ask Siri to open Notion AI
- Use Spotlight or the Shortcuts app
- Add Notion AI to your home screen
- On iPhone 15 Pro: assign to the Action Button
What Notion AI Can Do
Find Answers
Ask Notion AI questions and get responses based on:
- World knowledge
- Pages in your workspace (that you have access to)
- Connected tools like Slack and Google Drive (via AI connectors beta)
Take Actions on Pages
Notion AI can suggest and run useful actions:
- Extract action items
- Summarize a meeting
- Draft an agenda
- Ask questions based on current page content
Analyze Uploaded Files & Images
Upload a PDF, PNG, or JPEG to your AI chat and ask questions like:
“What are the key action items from this document?”
- Free Plan: PDFs/images under 5MB
- Paid/AI plans: PDFs up to 20MB, images up to 5MB
Create & Edit Content
Use Notion AI to:
- Write outlines, drafts, summaries
- Edit grammar, tone, length
- Translate content
- Build databases based on a prompt.
Autofill
Notion AI Autofill can:
- Generate summaries
- Translate content
- Draft action items directly into database properties
Great for keeping project trackers or content databases automatically up to date.
Notion AI Pricing
- Price: $10 per member/month (add-on to any plan)
- Annual discount: 20% if billed yearly
How to add:
- Go to Settings → Upgrade Plan / Explore Plans
- Under Notion AI, click Add to plan
Notion Calendar

Notion Calendar (formerly Cron) offers an integrated calendar experience. You can connect multiple Google calendars, manage events alongside tasks, and view your schedule directly inside Notion.
Manage Your Calendars
You can connect multiple calendars to Notion Calendar. Connected accounts and their calendars are listed in the left sidebar of Notion Calendar. You can collapse accounts, reorder them, and reorder calendars within them.
Add a calendar
To add a calendar to Notion Calendar:
1. Go to Settings → Calendars.
2. Select Connect next to the type of calendar you want to add.
Remove a calendar
You can remove any calendar from Notion Calendar. To do this, go to Settings → Calendars. Next to the calendar you want to remove, select Disconnect.
Set a default calendar
Notion Calendar defaults to a calendar when you create new events.
To set a default calendar, go to Settings → Calendars → Default calendar and pick the calendar you want to set as your default, this can be a Notion database.
Hide a calendar
If you want to hide a calendar, select 👁️ next to its name. This will take all events on that calendar away from view and the icon will have a strikethrough. To show a calendar, select 👁️ again.
Change a calendar's color or name
On desktop or web, select a calendar, then enter a new name or select a new color.
Downsides of Notion Calendar
Notion Calendar is enough for simple scheduling and staying within the Notion ecosystem, but lacks the intelligent planning, task-centric features, and deep work support that make Morgen a great daily execution tool alternative.
Try our Deep Work Timer - set the length of your session and press start to time your session.
Manage your events
Create events
To create an event in Notion Calendar, select a time slot in your calendar, then enter details for your event. If you want to create a focus, out of office, or birthday event, open the dropdown next to Event and choose your desired event type. To add participants and rooms, select Participants and Rooms and click on the relevant people and rooms. Once you’re done, select Send invite to notify invitees.
If you’re on mobile, select + at the bottom right of the app, then enter details for your event. To finish, select Done, or Send invite if you’ve added other participants.
Create multiple-day events with start and end times
To create multiple-day events with time details, select a time slot in your calendar, then drag it across the days the event will span. Once the event is created, you can enter start and end times for it.
Change your status and event privacy
1. Select an event.
2. In the right context panel, show your status as Busy or Free.
3. You can also make your event’s details visible to others by making them Public, or only to yourself and other participants by making them Private.
Change your event type
In Notion Calendar, there are different kinds of events: Event, Focus time, Out of office, and Birthday.
When you’re creating a new event and that event’s name contains the word "birthday", Notion Calendar will automatically make that event a Birthday event. The event will become an all-day event that repeats every year.
Email participants
Select an event, then select ••• at the top right of the right context panel → Email participants. This will open a mailto: link.
On Mac, this defaults to the Mail app. To change this:
- Open the Mail app.
- Go to
Settings.... - Open the dropdown next to
Default email readerand select your preferred email.
Move an event to a different calendar
Because Notion Calendar brings all of your commitments together in one place, it’s easy to move an event from one calendar to another. To do this:
- Select an event.
- In the right context panel, click on the name of the current calendar
- In the dropdown, select a new calendar for the event.
Bulk edit events
You can take action on multiple events at a time. These include changing their color or blocking them on another calendar. To do this:
- Hold
shiftwhile using Notion Calendar on desktop or web, then select multiple events. - Right-click, then select the action you want to take.
You can also shift multiple events over on your calendar. To do this:
- Hold
shiftwhile using Notion Calendar on desktop or web, then select multiple events. - Drag the events to their desired time slots. They’ll all move together.
Delete an event
There are a few ways to delete an event in Notion Calendar:
- Right-click the event and select
Delete. - Select an event and press
deleteon your keyboard. - On mobile, tap an event, then select
••→Delete event.
If you delete an event as a participant, you have the option to leave an RSVP note.
Notion Sites
With Notion Sites, you can transform any Notion page into a shareable, customizable website. Whether you’re building a portfolio, documentation hub, or company wiki, you can publish pages with just a few clicks. Paid plans include customization options and analytics.
What You Can Customize (Paid Plans Only)
Users on a Plus, Business, or Enterprise plan can:
- Add a custom favicon (site browser icon)
- Set a page theme (Light, Dark, or System)
- Modify the navigation bar and header
- Create a custom share preview for social links
- Integrate with Google Analytics
- Hide the Notion watermark (with a custom domain)
For a custom domain you’ll need the Notion custom domain add-on.
Customize Share Previews
Control how your site appears in link previews (e.g., on social media):
1. Open the published Notion page → click Share → Publish
2. Click Site customization
3. Under Share preview, hover over the preview and select Upload image
4. Click Publish changes to update
Set a Site Theme
Match your site’s theme with your content or brand:
1. Go to Share → Publish → Site customization
2.Under Theme, select:
- System (match user’s OS)
- Light
- Dark
4. Click Publish changes
Customize Your Favicon
To update the small icon that appears in browser tabs:
1. Share → Publish → Site customization
2. Under Favicon, choose:
- Page icon (your existing Notion icon), or
- Upload image (custom .png or .ico file)
3. Click Publish changes
Customize Your Site Header
Your site header appears at the top of every page and helps with navigation and branding.
To customize:
1. Share → Publish → Site customization → Header
Here, you can:
Toggle on/off:
- Breadcrumbs (shows the page hierarchy)
- Search (adds a search bar for visitors)
- Duplicate as template (lets others copy your site as a Notion page)
- Notion watermark (removable only with custom domain)
Add Navigation Links:
- Under Navigation, click Add page to link other pages in your workspace
2. Click Publish changes
Connect Google Analytics
Track visitor behavior and site performance with Notion’s built-in Google Analytics integration.
Steps:
1. Share → Publish → Site customization
2. Click Google Analytics
3. Paste your Measurement ID
4. Click Publish changes
Free Plan Users vs Paid Plan Users
Marketplace
The Notion Marketplace is your trusted destination for free and paid templates made by verified creators. These templates range from content calendars to productivity, project planning, communities, and personal finance. All purchases are refundable.
Find Templates
Access the Marketplace from your Notion sidebar:
Go to → Templates
Explore templates by:
- Category: Work, Life, or School
- Search: Use the top search bar to find something specific
- Curation: Browse by most used, trending, or new additions
Each listing displays:
- Template cost (Free or $)
- Creator name
- Description & use case
- Notion features used (e.g., buttons, databases)
- Number of times added
- Date of last update
- Ratings & reviews
Add a Template
Free templates
Click Add to instantly duplicate the template to your workspace.
🎁 Freebie: Grab your our Notion time blocking template to map out your tasks and projects, and capture all the information you need for high impact time blocking.

Paid templates
Click Buy for ${price} and follow these steps:
1. Select where to duplicate the template (Private or Teamspace)
2. Enter payment info (USD only, credit cards only)
3. Optionally apply a coupon
4. Accept Notion’s terms & 14-day refund policy
5. Grant email access if requested by creator (optional)
6. Click Buy
Manage Your Templates
To view templates you've added or purchased:
1. Open Templates from your sidebar
2. Click Added at the top
You’ll see:
- A full list of added templates
- Who added each one
- Price paid (if applicable)
- Purchase date
Review or Contact a Creator
Leave a review:
- Click •• next to a template in the Added list
- Select Leave a review
- Follow the prompt (must be respectful and relevant)
Contact the creator:
- Click •• → Contact creator
Wrapping up
By now you’ve mastered the basics like pages, blocks, and templates, and gradually explored databases, automations, and integrations. The key is to start simple, build intentionally, and evolve your workspace as your workflow becomes more sophisticated.
Recommended setup:
- Slack for turning messages into Notion tasks.
- Morgen for unifying calendars, daily planning, and AI time blocking based on your capacity, priorities, due dates, and energy levels.
- Zapier for integrating external tools.
- Miro for visualizing ideas.
- Github for linking pull requests, and databases to Notion.
You have the foundation and it's time to start building. The best system is the one that supports your thinking, not one that slows you down.
.svg)
.webp)